
Genuine Delonghi replacement part, this item is sold individually.
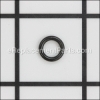
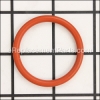
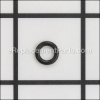
This O-Ring is used as a seal to keep liquid from leaking between two connected parts.
Because of the heat that this part comes in contact with it does wear out often.
It is advised to have an extra one or two on hand.
O-ring (id: 3.85mm T: 2mm) 5313217701
OEM part for: DeLonghi
Part Number: 5313217701
$7.41
In Stock
Jump To:
Product Description ?
- OD 5/16 Inch
- ID 3/16 Inch
- Classification: Part
- Weight: 0.01 lbs.
- Shipping: Ships Worldwide
Frequently Purchased Together ?


Compatibility
This O-ring (id: 3.85mm T: 2mm) will fit the following 185 machines. Confirm this part works with your model, and view the detailed model diagrams and repair help we have to offer.
Displaying 20 of 185 matching models.
DeLonghi
Show More Compatible Models185 total model matches. Try the above search to narrow your results.
This is the official OEM part for the following brands:
- DeLonghi
This item works with the following types of products:
- Coffee Maker
- Espresso
This part replaces obsolete part #: 5332199800, 5332154700, 536369
Customer Part Reviews ?
Average Rating (out of 5):
Click to filter by ratings:
5 stars
6
4 stars
0
3 stars
0
2 stars
0
1 stars
1
< PREV
- 1
I ring for steam wand
Perfect fit
Guest -
May 25, 2023
Verified Purchase
Coffee pot repair
The o-ring fit perfectly. It was received in just a few days. My coffee maker is back to making a great cup.
Guest -
August 15, 2022
Verified Purchase
"O" rings and tube
I ordered two "O" rings and the tube connecting the pump to the pressure relief valve on my DeLonghi Espresso machine. I had been experiencing a leak in this area. These parts were a really snug fit and very easy to install. I have no further leaks and my machine is now back in tip top shape. Thank you eReplacement Parts.
iGlobal -
July 21, 2020
Verified Purchase
Completely satisfied
Work as expected, arrived quickly in Canada
iGlobal -
February 25, 2020
Verified Purchase
Easy Repair
After taking off the top, the tube was easy to access. Just remove the spring clip, pull out the tube end, fish out the old o-ring with a toothpick or other tool, then put the new O-Ring on the end of the tube and insert. Replace the spring clip and top and you are good to go.
Guest -
October 31, 2019
Verified Purchase
It is the right part. No more water leaks.
It arrived very quickly, no more water drip, thank you for your help ereplacementparts!!
Nicholas -
September 22, 2019
Verified Purchase
Wrong parts
It was not the right parts showing on your drawing I guess you guys assumed that what’s ever is in the other part of tube will be the same on the orther end, when I open my coffee maker it’s was different, I’m not sure if you guys have it because it’s not on the drawing that’s you guys providing
Guest -
December 30, 2019
Verified Purchase
Questions & Answers ?
Our customer Service team is at the ready daily to answer your part and product questions.

Ask our Team
We have a dedicated staff with decades of collective experience in helping customers just like you purchase parts to repair their products.
Does this fit my product?Questions & Answers for O-ring (id: 3.85mm T: 2mm)
We are looking for the O ring for the frother. We are not sure which one to get. Please help! Thank you!
Phil
for model number Delonghi ECAM22110 magnifica xs
asked on 2023-12-20
Hi Phil,
Thank you for your question. There is an o-ring, part number 5313220031, and an o-ring seal, part number 5313217751, used for the frother. We hope this helps!
eReplacementParts Team December 20, 2023
I am looking for a part number for the seal. I cannoy find the model number. Iy has the foamer on the side
Penni
for model number Not sure. Type EC-155 serial #42022
asked on 2023-03-04
Hi Penni,
Thank you for your question. If you are referring to the frother, the part number listed under your model number for it is 535789. If you would like to place an order for it, please call our customer service line and anyone will be happy to assist you. We look forward to hearing from you!
eReplacementParts Team March 04, 2023
Hello, I am looking for o-ring 5313217701, which you have listed on your website, however it should have OD 7.85mm, ID 3.85mm but you have diameters listed as 5/16 in and 3/18 in which is not the same. Please advise if you have an error in OD and ID description or you have error in part number.Thank you.
Oleg
for model number Delonghi primadonna650.85
asked on 2023-01-12
Hi Oleg,
Thank you for your question. The dimensions for this o-ring are 7.85 mm for the outer diameter and 3.85 mm for the inner diameter. If you need help placing an order for it, customer service is open 7 days a week and anyone will be happy to assist you. Please feel free to give us a call. We look forward to hearing from you!
eReplacementParts Team January 12, 2023
Customer Repair Instructions ?
All our customer repair instructions are solicited directly from other customers just like you who have purchased and replaced this exact part.
Water was leaking from a variety of connection points within my DeLonghi Magnifica Super Automatic Espresso machine
Brian - February 1, 2016
👍 13 of 14 people found this instruction helpful
Tool Type
Coffee Maker
Difficulty
Easy
Time
15-30 minutes
Tools Used
Screwdriver, Pliers
Parts Used
Remove sides, back, top and front control panel following video on eReplacementparts.com web site. Remove clips where tubes connect to generator and other interior machine parts, remove tube, remove old o-ring, replace with new o-ring, replace clips. Reassemble.
Did you find this story helpful?
Thanks for voting and helping fellow customers!
a water leak from the pump hoses
Marco - December 30, 2020
👍 2 of 2 people found this instruction helpful
Tool Type
Coffee Maker
Difficulty
Medium
Time
30-60 minutes
Tools Used
Screwdriver, Pliers, Socket set
Parts Used
remove the casing from the top, disconnect the hose with the water leak and replace the o-rings
Did you find this story helpful?
Thanks for voting and helping fellow customers!
leaks
Ken - April 27, 2020
👍 2 of 2 people found this instruction helpful
Tool Type
Coffee Maker
Difficulty
Medium
Time
15-30 minutes
Tools Used
Screwdriver, Pliers, small pick for O-ring removal
1. Removed water tank & used coffee catcher and tray.
2. Removed sides, back, and top panel.
3. Carefully make relief in wires, and water tubes
4. Remove 4 mounting screws and the generator assembly
5. Remove water connection to generator.
6. Remove and replace connector tail piece.
7. Reverse steps 5 through 1 in reverse order.
2. Removed sides, back, and top panel.
3. Carefully make relief in wires, and water tubes
4. Remove 4 mounting screws and the generator assembly
5. Remove water connection to generator.
6. Remove and replace connector tail piece.
7. Reverse steps 5 through 1 in reverse order.
Did you find this story helpful?
Thanks for voting and helping fellow customers!
The Delonghi 5400 machine started leaking water from the heater (generator)
Randall - December 23, 2021
👍 1 of 1 people found this instruction helpful
Tool Type
Coffee Maker
Difficulty
Medium
Time
More than 2 hours
Tools Used
Screwdriver, Pliers, Wrench Set
I've had this machine for almost 10 years. 3 years ago it developed a leak. I looked at repairing it but the parts were not available at the time. We bought a new Delonghi (the 3300) and I kept the 5400 for parts as it looked like all the internal mechanical components were the same. We now purchased a cabin in the woods and wanted good coffee. These machines are pretty pricey these days so I decided to take a stab at repair again. Thanks to e-replacementparts I was able to get the parts I needed for a reasonable price. To get at the generator, first unplug the unit, then you need to remove all the outer housing panels (this should be obvious). Then the generator has 4 long machine screws holding it in place as well as 6 wires that need to be disconnected. Two are power, two are sensors and 2 are for a microswitch. I just followed the leads back to where they connected and took photos of where they plugged into so I could plug in the new generator. After unplugging the wires you'll need to remove the 4 long screws. A Phillips screwdriver and some needle nose players for the small nuts on the bottom. A couple of these nuts are hard to reach and you will need patience upon reassembly and nimble fingers. Once the screws are removed, there are two water connections to remove. they are held on by small metal clips. just pull the clip out with your pliers and the water line will come out. then remove the generator slowly. You will note a black rubber water (drain) connector on the underside of the unit opposite the side water connector. You will want to attach that one first upon putting in the new generator. Reassembly is as they say the opposite of removal. Some tips. Replace the o-rings on the two water lines (order them at the same time) or they will leak as I learned. Attach the black rubber drain line and the side water line before screwing the generator down. Once set in place put all the screws in loosely to get it lined up as it is a tight and precise fit. Get all of the screws tightened down - this is important as the generator is part of the coffee "press" and will be pushed up on when making coffee. After reassembly carefully put the water tank in (without the side panels on and start the machine and make a coffee or two. Use a flashlight to check for leaks around the generator. Be careful not to touch anything as the generator gets very very hot (it may smell a little hot at first use) and there are exposed electrical wires that pose a shock hazard. Once you confirm you have no leaks unplug again and put on the top and side panels. You are now good to go. Use this time to clean the unit thoroughly and lubricate the press o-rings with food grade lubricant. Good luck!
Did you find this story helpful?
Thanks for voting and helping fellow customers!
Water leaks around the boiler
Kiet - November 2, 2018
👍 1 of 1 people found this instruction helpful
Tool Type
Coffee Maker
Difficulty
Easy
Time
15-30 minutes
Tools Used
Screwdriver, Pliers
Parts Used
Remove screws on the back of the espresso machine
Remove the rear cover panel
Slide the side cover panels to remove
Remove screws and the top cover
Remove the tube ends and replace each washer, refer to the part drawing from the website
Put the top over back and test for any leaking
Put the side and then rear panels back
Done
Remove the rear cover panel
Slide the side cover panels to remove
Remove screws and the top cover
Remove the tube ends and replace each washer, refer to the part drawing from the website
Put the top over back and test for any leaking
Put the side and then rear panels back
Done
Did you find this story helpful?
Thanks for voting and helping fellow customers!
Water leak
Ricardo - January 4, 2017
👍 1 of 1 people found this instruction helpful
Tool Type
Coffee Maker
Difficulty
Medium
Time
30-60 minutes
Tools Used
Screwdriver, Pliers, Hook and pick tool to remove O Ring
Removed tube retaining clips with pliers, carefully used a hook and pick tool to remove ORing from inside connection to boiler. Lubricated new ORing with small amount of Vaseline to slide deep into connection to boiler. Replaced tube and retaining clips.
Did you find this story helpful?
Thanks for voting and helping fellow customers!
I had 2 leak points, at the boiler inlet and at the diffuser outlet, also 2 rubber foots were missing
CARLOS - July 14, 2016
👍 1 of 1 people found this instruction helpful
Tool Type
Coffee Maker
Difficulty
Medium
Time
15-30 minutes
Tools Used
Screwdriver, Pliers
1. Brushed all tubing with water and soap to remove algae;
2. Descaled boiler;
3. Replaced boiler inlet tube and o-rings (suggest to use a tiny pint of Vaseline to adjust the o-ring of the boiler easier);
4. Replaced boiler valve set (this needs to disassemble it and a new o-ring is needed after);
5. Installed 2 missing rubber feet;
6. Cleaned coffee maker's base plate with sponge and soap;
7. Finally closed everything and finished work.
=> Awesome result - machine's new again!
Did you find this story helpful?
Thanks for voting and helping fellow customers!
Leaking water from the heating element connection to water pump when machine is brewing
Krystal - March 11, 2016
👍 5 of 9 people found this instruction helpful
Tool Type
Coffee Maker
Difficulty
Medium
Time
Less than 15 minutes
Tools Used
Pliers
Parts Used
I unplugged the machine and removed the water tank and water tank cover. Then, I unscrewed the two screws on top of the machine holding the main covers in place, and carefully pried the steam knob off. After that, taking the cover off the unit is a little tricky. There's a tab in the back that locks it into place and takes some finesse to not break while trying to take the cover off.
Once it's off however, I located the tube running from the water pump to the heating element, removed the alligator clip holding it in place, and carefully pulled the tube free from the connector. I had to fish the o ring out from the connector with a toothpick, but it was relatively easy. I then slipped the new o ring over the tube, re-inserted the tube very firmly into the connector, locked it in place with the alligator clip, and tested the machine for leaks. Once confident that the leaks were solved, I replaced the cover, steam knob, etc and screwed everything back into place.
Overall a very simple repair, just take your time and make sure to use common sense.
Did you find this story helpful?
Thanks for voting and helping fellow customers!
Hose leaked, old washer
Marcel - November 6, 2020
👍 1 of 2 people found this instruction helpful
Tool Type
Coffee Maker
Difficulty
Easy
Time
15-30 minutes
Tools Used
Screwdriver, Pliers
Opened machine
Took retaining clips off the hose
Applied silicone grease on the washer and replaced hose with new washers.
Very easy job.
Took retaining clips off the hose
Applied silicone grease on the washer and replaced hose with new washers.
Very easy job.
Did you find this story helpful?
Thanks for voting and helping fellow customers!
Espresso machine leaking
Walid - February 1, 2019
👍 1 of 2 people found this instruction helpful
Tool Type
Coffee Maker
Difficulty
Medium
Time
1-2 hours
Tools Used
Screwdriver, Pliers, None
Identified section leaking
Tried several combinations of gaskets and O rings and finally stopped the leak
Tried several combinations of gaskets and O rings and finally stopped the leak
Did you find this story helpful?
Thanks for voting and helping fellow customers!
Load More Install Stories
OEM stands for Original Equipment Manufacturer and means the part you’re buying is sourced directly from the manufacturer who made your product. At eReplacementParts, we sell only genuine OEM parts, guaranteeing the part you’re purchasing is of better design and of higher quality than aftermarket parts.
Learn MoreOur product descriptions are a combination of data sourced directly from the manufacturers who made your product as well as content researched and curated by our content & customer service teams. This content is edited and reviewed internally before being made public to customers.
Our customer service team are at the ready daily to answer your part and product questions. We have a dedicated staff with decades of collective experience in helping customers just like you purchase parts to repair their products.
All our part reviews are solicited directly from other customers who have purchased this exact part. While we moderate these reviews for profanity, offensive language or personally identifiable information, these reviews are posted exactly as submitted and no alterations are made by our team.
All our customer repair instructions are solicited directly from other customers just like you who have purchased and replaced this exact part. While we moderate these reviews for profanity, offensive language or personally identifiable information, these reviews are posted exactly as submitted and no alterations are made by our team.
Based on data from past customer purchasing behaviors, these parts are most commonly purchased together along with the part you are viewing. These parts may be necessary or helpful to replace to complete your current repair.
All our installation videos are created and produced in collaboration with our in-house repair technician, Mark Sodja, who has helped millions of eReplacementParts customers over the last 13 years repair their products. Mark has years of experience in selling and repairing both commercial and residential products with a specialty in gas-powered equipment.
This data is collected from customers who submitted a repair instruction after replacing this exact part. Customers can rate how easy the repair was to complete and how long it took. We aggregate this data to provide a repair rating that allows customers to quickly determine the difficulty and time needed to perform their own repair.