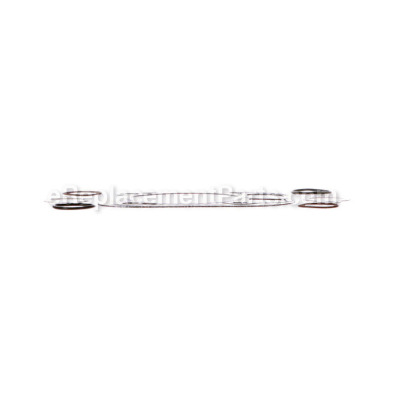


This item is an authentic Kohler replacement part that has been sourced from the original manufacturer to be used with small engines. The gasket is used to seal the connection between the cylinder and the cylinder head. This item also includes the exhaust gasket, but is priced as a single part.
Kit: Cylinder Head Gasket 32 841 02-S
OEM part for: Kohler, Toro
Part Number: 32 841 02-S
$25.07
In Stock
Jump To:
Frequently Purchased Together ?


Compatibility
This Kit: Cylinder Head Gasket will fit the following 1037 machines. Confirm this part works with your model, and view the detailed model diagrams and repair help we have to offer.
Displaying 20 of 1037 matching models.
1037 total model matches. Try the above search to narrow your results.
This is the official OEM part for the following brands:
- Cub Cadet
- Kohler
- Toro
This item works with the following types of products:
- Engine
- Lawn Tractor
This part replaces obsolete part #: KH-32-841-02-S ((Kit Includes: 1-Cylinder Head Gasket, 1-Exhaust Gasket, 1-Intak), KH-32-841-01-S, 3284101-S, 32-841-01-S
Customer Part Reviews ?
Average Rating (out of 5):
Click to filter by ratings:
5 stars
6
4 stars
0
3 stars
0
2 stars
0
1 stars
0
< PREV
- 1
All the parts I needed, with an instruction sheet
Quick shipping and everything I needed
Guest -
October 30, 2021
Verified Purchase
Great parts ,up and running
All in great condition, Thanks
Guest -
November 27, 2019
Verified Purchase
Great quality of part
The parts highly extended quality from the original parts that were factory on my mower. Completely satisfied with what I received.
Guest -
October 21, 2019
Verified Purchase
Cylinder Head Gasket Kit
Easy Repair for me, Correct part, Arrived Fast
Guest -
September 24, 2019
Verified Purchase
Exact Fit
Gaskets were packaged well and in good condition - Arrived on time - The old mower is running like new - will buy from eReplacementParts again
John -
September 23, 2019
Verified Purchase
Excellent
Works great and quick delivery 👍
Guest -
August 7, 2019
Verified Purchase
Questions & Answers ?
Our customer Service team is at the ready daily to answer your part and product questions.

Ask our Team
We have a dedicated staff with decades of collective experience in helping customers just like you purchase parts to repair their products.
Does this fit my product?Questions & Answers for Kit: Cylinder Head Gasket
I have a Kohler model #CH22S Spec # 76516 Serial #2903311751 that I need a head gasket for, what is the part number?
Lynn
for model number CH22S-76516
asked on 2022-04-28
Hello Lynn, Thank you for contacting us. We have researched the model you have provided and have found the part you are looking for is Part Number: 24 041 67-S. If you need help placing an order, customer service is open 7 days a week. Please feel free to give us a call. We look forward to hearing from you!
eReplacementParts Team April 28, 2022
Customer Repair Instructions ?
All our customer repair instructions are solicited directly from other customers just like you who have purchased and replaced this exact part.
Leaking oil due to blown head gasket
Charles - April 9, 2016
👍 8 of 12 people found this instruction helpful
Tool Type
Engine
Difficulty
Easy
Time
More than 2 hours
Tools Used
Screwdriver, Socket set, Wrench Set
Parts Used
Remove head, carefully clean all surfaces and install new gasket.
Did you find this story helpful?
Thanks for voting and helping fellow customers!
Head gasket was blown on one of the twin cylinders
Tony - December 11, 2023
👍 3 of 3 people found this instruction helpful
Tool Type
Engine
Difficulty
Medium
Time
More than 2 hours
Tools Used
Socket set, Wrench Set, Nutdriver, Gap gauges
Parts Used
1. Cub Cadet design makes you take the bracket for the gas tank off, the gas tank, fuel pump, and the engine shroud on the Kohler SV 725 24 hp twin engine.
2. Remove valve cover on cylinder that needs repair.
3. Rotate engine to Top Dead Center on the compression stroke making sure both valves are closed. The magnet on the flywheel
wil be past the coil/spark plug wire by as much as an inch before the piston starts its motion down away from TDC, then remove valve rockers and push rods from head. Note which push rod is intake and exhaust (upper-lower) and mark which is which because they need to be installed in the cylinder as they were
4. Disconnect exhaust pipe on both cylinders. Then remove intake manifold from both cylinders.
5. Loosen and remove 4 cylinder head bolts that are located on the head (2) and under the valve rockers (2).
6. Pry head off of cylinder without damaging cooling fins on head/cylinder.
7. Remove old gasket from head and cylinder. This area needs all old gasket material removed to install new gasket properly. Make sure it's very clean. Install new gasket.
8. Install head making sure gasket stays in place. The cylinder should have 2 dowel pins to help locate gasket and head in proper position. Tighten in 2 series of torque sequences, first at 15 ft.lbs, then tighten 4 head bolts again at 32 ft. lbs.
9. Install valve push rods remembering the order you removed them; upper in the upper port, the lower in the lower port. Install valve rockers making sure the rocker is located on push rod and valve.
10. While engine is still at TDC, use gap gauge to measure distance between valve stem and rocker. This distance should be between .002" and .0035" inch for both intake and exhaust on this particular model of Kohler. Tighten or loosen the large adjustment nut on the rocker arm to adjust the gap between the rocker arm assembly and valve stem. Your model could vary. Check spec sheet for your individual engine model.
11. Once your gap between the valve rocker and valve stem is achieved, lock the adjustment nut down tightening the 25T torqs bolt inside the adjustment nut. Rotate the engine by hand to make sure all is working properly, then return to TDC on the compression stroke and re-check your valve/ valve rocker clearance.
Assemble everything you took apart in reverse order. I think that's it.
Did you find this story helpful?
Thanks for voting and helping fellow customers!
no compression in #2 cylinder and not firing
terrance - June 21, 2023
Tool Type
Lawn Tractor
Difficulty
Medium
Time
More than 2 hours
Tools Used
Screwdriver, Pliers, Socket set, Wrench Set, feeler gauges
Parts Used
I had to replace a bent pushrod on the #2 cylinder along with head gasket and a new coil. I also replaced the fuel pump because the mower was 18 years old.
Did you find this story helpful?
Thanks for voting and helping fellow customers!
Misfired/smoked/sluggishness
William - November 16, 2022
Tool Type
Lawn Tractor
Difficulty
Medium
Time
1-2 hours
Tools Used
Socket set, Wrench Set, Spring compressor/valve
Parts Used
Tore out the top half of the motor,rebuilt carb reran vacuum to the breather from the tank neck ,removed both heads/cleaned and replaced both heads,reset the valves(.005) intake and exhaust,made new gaskets for the valve covers,topped off the oil ,runs great no smoking or backfires now on to the transmission which I think I figured out
Did you find this story helpful?
Thanks for voting and helping fellow customers!
Blown head gaskets
Dominic - April 10, 2020
Tool Type
Lawn Tractor
Difficulty
Medium
Time
1-2 hours
Tools Used
Screwdriver, Pliers, Socket set, Wrench Set, Nutdriver, Straight edge square, feeler gauges, fine sandpaper
Parts Used
Both cylinder heads had to be removed (lack of compression), the deck of the block and the mating surface of the cylinder heads had to be checked for flatness. The normal procedure included taking all the accessories off to get to the cylinder heads. The gasket material was high quality and worked very well, compression came up to spec and the mower is running great!!
Did you find this story helpful?
Thanks for voting and helping fellow customers!
Engine Oil Leak
William - September 24, 2019
Tool Type
Lawn Tractor
Difficulty
Easy
Time
1-2 hours
Tools Used
Socket set, Wrench Set, Piston Ring Compressor
Parts Used
Was replacing main oil seals and decided to go a step further and replace head gaskets at the same time.
1. Remove Engine
2. Remove All Sheet Metal
3. I did a complete engine tear down
4. Used piston ring compressor to get pistons back into jugs
5. Put engine back together
1. Remove Engine
2. Remove All Sheet Metal
3. I did a complete engine tear down
4. Used piston ring compressor to get pistons back into jugs
5. Put engine back together
Did you find this story helpful?
Thanks for voting and helping fellow customers!
burning a lot of oil
Louis - May 19, 2019
Tool Type
Engine
Difficulty
Medium
Time
More than 2 hours
Tools Used
Pliers, Socket set, Wrench Set, puller
Parts Used
removed motor disassembled it replaced the rings valve job and honed the cylinder
assembled it and It runs Like a Top
assembled it and It runs Like a Top
Did you find this story helpful?
Thanks for voting and helping fellow customers!
OEM stands for Original Equipment Manufacturer and means the part you’re buying is sourced directly from the manufacturer who made your product. At eReplacementParts, we sell only genuine OEM parts, guaranteeing the part you’re purchasing is of better design and of higher quality than aftermarket parts.
Learn MoreOur product descriptions are a combination of data sourced directly from the manufacturers who made your product as well as content researched and curated by our content & customer service teams. This content is edited and reviewed internally before being made public to customers.
Our customer service team are at the ready daily to answer your part and product questions. We have a dedicated staff with decades of collective experience in helping customers just like you purchase parts to repair their products.
All our part reviews are solicited directly from other customers who have purchased this exact part. While we moderate these reviews for profanity, offensive language or personally identifiable information, these reviews are posted exactly as submitted and no alterations are made by our team.
All our customer repair instructions are solicited directly from other customers just like you who have purchased and replaced this exact part. While we moderate these reviews for profanity, offensive language or personally identifiable information, these reviews are posted exactly as submitted and no alterations are made by our team.
Based on data from past customer purchasing behaviors, these parts are most commonly purchased together along with the part you are viewing. These parts may be necessary or helpful to replace to complete your current repair.
All our installation videos are created and produced in collaboration with our in-house repair technician, Mark Sodja, who has helped millions of eReplacementParts customers over the last 13 years repair their products. Mark has years of experience in selling and repairing both commercial and residential products with a specialty in gas-powered equipment.
This data is collected from customers who submitted a repair instruction after replacing this exact part. Customers can rate how easy the repair was to complete and how long it took. We aggregate this data to provide a repair rating that allows customers to quickly determine the difficulty and time needed to perform their own repair.